Step 1. Take a dive into Windows OS downgrade rights details: Windows 8/8.1 Pro can be downgraded to Windows 7 Professional/Vista only, while Windows 7 Professional/Ultimate can be reinstalled on Windows Vista Business/Ultimate, Windows XP Professional/Tablet PC/x64 bit.
Step 2. Prepare a DVD+R/DVD-R or a USB (16GB) as the Windows 7 Professional installation media. You can use PowerISO v6.5 (32-bit) or PowerISO v6.5 (64-bit) softwares to do this.
Step 3. Be sure to have a valid product key because you'll need it when you're done.
 Step 4. Backup data/configuration
first to a formatted USB drive, DVD disc or online Cloud storage before
downgrading Windows 8 Pro to Windows 7 Professional: slide to the bottom
right on your Windows 8/8.1 screen -> click the search button ->
type "Create a recovery drive" -> select the files you want to backup -> choose your inserted drive -> Start to create Windows 8 recovery drive;
Step 4. Backup data/configuration
first to a formatted USB drive, DVD disc or online Cloud storage before
downgrading Windows 8 Pro to Windows 7 Professional: slide to the bottom
right on your Windows 8/8.1 screen -> click the search button ->
type "Create a recovery drive" -> select the files you want to backup -> choose your inserted drive -> Start to create Windows 8 recovery drive;Step 6. Adjust system setup settings
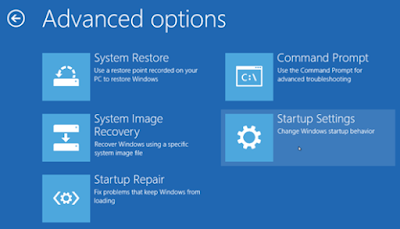
1. Enable the advanced startup mode so as to enter the System BIOS: press Window Start Key + C -> type Settings -> Change PC settings -> choose General -> click Restart Now button under the Advanced Startup part;
2. Troubleshoot -> UEFI Firmware Settings -> Restart again;
3. Disable Secure Boot in BIOS, save the settings and exit.
Step 7. Downgrade Windows 8 to Windows 7 steps (using USB):
1. Insert your USB media into your Windows PC and restart the computer;
2. Press F12, select USB Flash Drive and tab Enter;
3. Check the time, language, keyboard method and go to the Next;
4. Click Install Now on the Windows 7 Pro installation page and accept the license terms;
5. Choose Normal or Custom installation type based on your need, and wait for the Windows 7 to be installed on your Windows 8;
Step 8. Install Wireless or LAN driver backed up in step 5.
Step 9. Activate Windows by entering a valid product key, a used one can work too.
Windows Related: Downgrade Windows 10 to Windows 8.1/7 | Install Windows 10 in a Virtual Machine


![List of Smartphones compatible with JTL Faiba4G and how to configure Faiba4G [Updated]](https://blogger.googleusercontent.com/img/b/R29vZ2xl/AVvXsEikdB2PwQQQeIImGjcyfKZFQVNJIOZhEOx4Z3RpDpoFpFem4oAbU_SMTzRx_5U0F2i8aboMnNsIjmKQOTp39LM7lajjn3rsJ-7IvQRYbhEM5u2T9Y9zlrfHfvjbjQn4sPE96ZXK6w_KrgP_/s72-c/JTechpreneur_Smartphone+LTE+Compatible.png)


No comments:
Post a Comment